Audio editing can be a challenge, but mastering Adobe Audition can save you time and make your projects shine. Whether you’re cleaning up a podcast or working on a wedding video, having the right techniques in your toolbox can make all the difference.
Coming to you from Mike Russell, this practical video begins with tips on shortcuts and fast editing techniques. Learning to navigate with JKL keys for shuttle speed and configuring settings for playback can drastically speed up your workflow. Russell also shows how to declutter the multi-track interface using Shift + E, focusing your view on active tracks. These small adjustments save time and reduce distractions while editing. The ripple delete function is another good tool to know. Instead of manually deleting and shifting clips to close gaps, one command aligns your tracks instantly, streamlining dialogue edits.
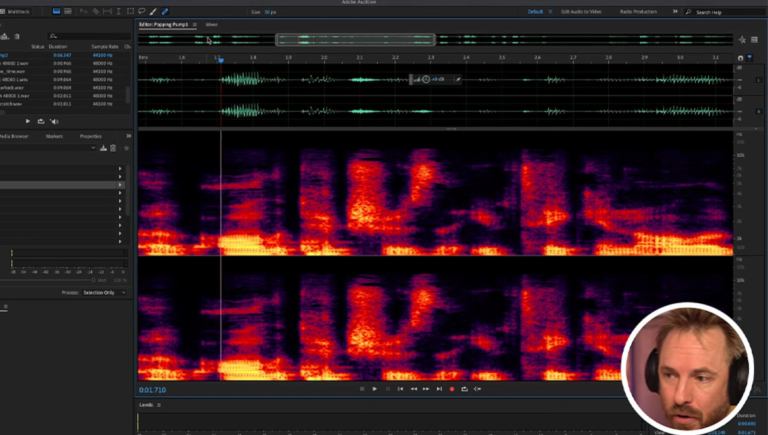
The spectral view, introduced in this video, is an essential tool. It provides a detailed heat map of audio frequencies, allowing you to spot specific sounds like sibilance or unwanted noise. This view goes beyond the basic waveform, giving you more precision when fixing audio issues. For example, Russell demonstrates using this tool to identify background noise in quiet moments. Combining spectral editing with advanced noise reduction tools can eliminate these distractions without overly processing the audio. These techniques are particularly useful for improving the quality of spoken word recordings, such as interviews.
Batch processing is another feature worth exploring. Russell shows how to handle multiple files at once, whether normalizing volumes, applying presets, or converting formats. This is ideal for projects involving repetitive tasks, like ensuring uniformity in voiceover recordings. The ability to save custom presets for effects and batch apply them simplifies what could otherwise be a tedious, manual process.
Markers and auto-healing tools round out the tips. Markers help keep projects organized, letting you pinpoint areas for edits or highlight important sections during recording. You can even use them to create ranges for more detailed annotations. Auto-heal, similar to Photoshop’s spot healing, is a quick way to fix pops and plosives in spectral view. These tools cut down editing time and improve the overall flow of your sessions. Check out the video above for the full rundown from Russell.
