Inserting tables into your Word document is a great way to organize and present information. However, you don’t have to stop there. With a few simple formatting adjustments, you can transform basic tables into visually appealing, professional elements.
1
Position Your Table
Proper table positioning is key to creating a polished document. You can easily manage the placement and alignment of tables using the Table Properties feature in Word.
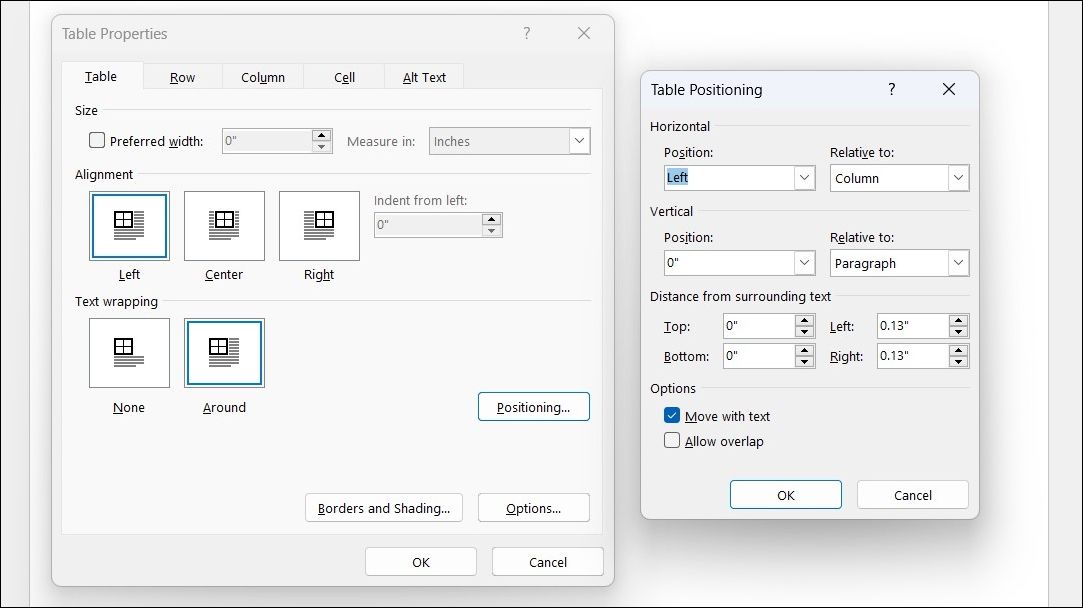
To access this, right-click on the table and select Table Properties from the context menu. This will open a dialog box where you can adjust the table’s size, alignment, indentation, and text wrapping to suit your needs.
By default, Word aligns tables to the left margin. If you want to center the table, go to the Table tab and select the Center option under the Alignment section. You can then adjust the table’s distance from the left margin using the Indent from Left option.
Positioning tables relative to surrounding text is also easy. Simply drag the table by its handle, located in the top-left corner, to reposition it. Once you do, Word will automatically adjust the text wrapping from None to Around. For greater control, use the Table Positioning dialog box within Table Properties to specify the distance from surrounding text for each side of the table.
If the table is closely related to specific text, enable the Move with Text option. This ensures the table stays vertically aligned with the corresponding paragraph, even if the text shifts.
2
Use the Ruler
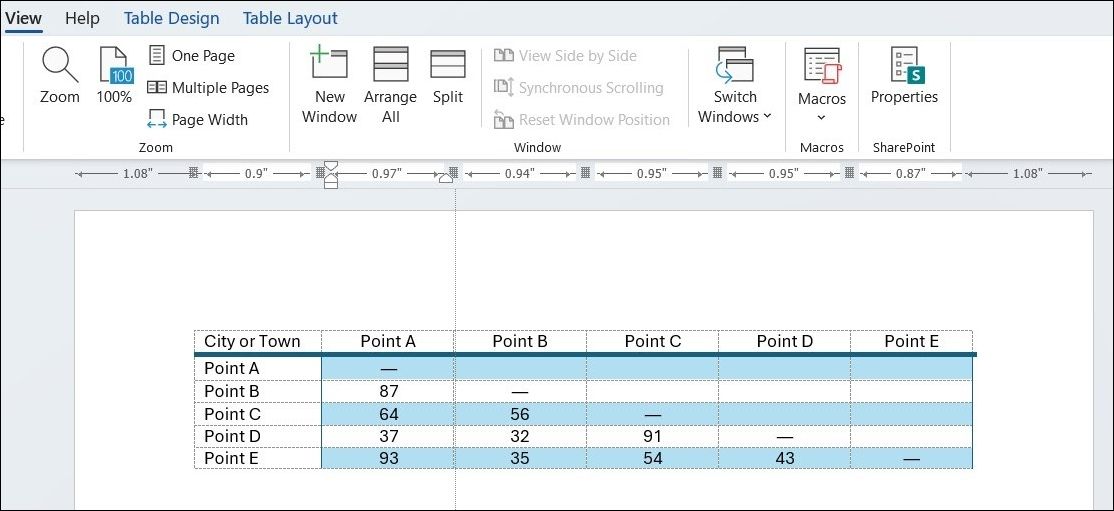
If you’re looking for an easy way to improve the appearance of tables in Word, getting the sizing right is key. For precise control over the size of your rows and columns, use the ruler in Word to make accurate adjustments.
To do this, hover your mouse over a table border. When the double-arrow pointer appears, click and hold the border while pressing the ALT key. Then, drag the rows or columns to adjust them to your desired measurements.
3
Distribute Rows and Columns Evenly
Looking to create a table with evenly distributed rows and columns? The good news is, you don’t need to adjust each row or column manually.
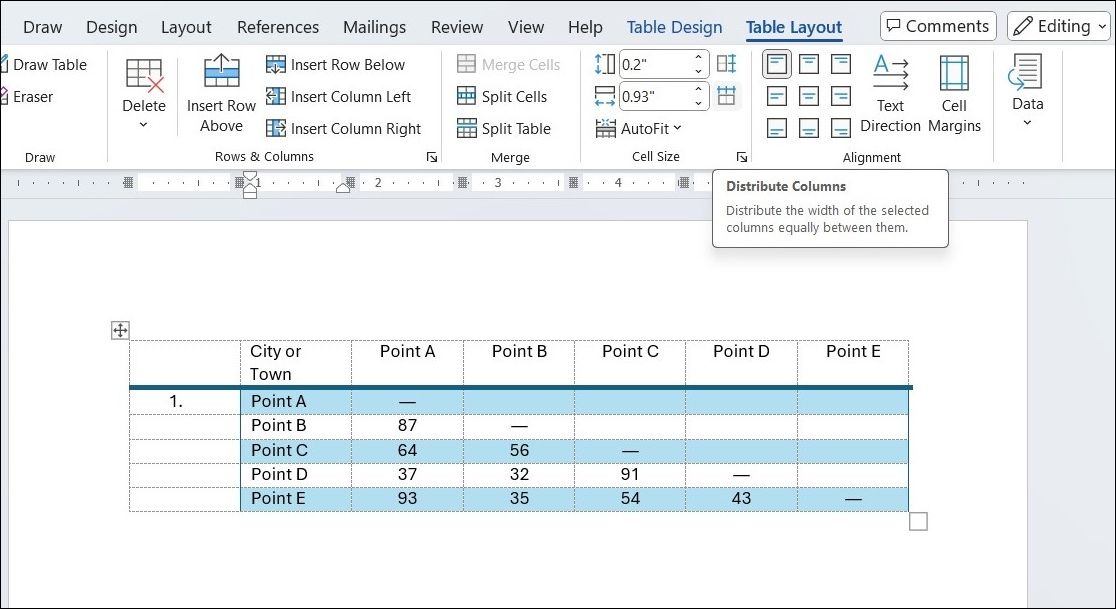
Simply select the entire table and go to the Table Layout tab. In the Cell Size group, click the Distribute Rows or Distribute Columns, and Word will automatically adjust the rows or columns to ensure equal spacing.
4
Changing Table Layout and Appearance
Once your table is positioned and the rows and columns are adjusted, you can further enhance its layout and appearance to match your document’s style.
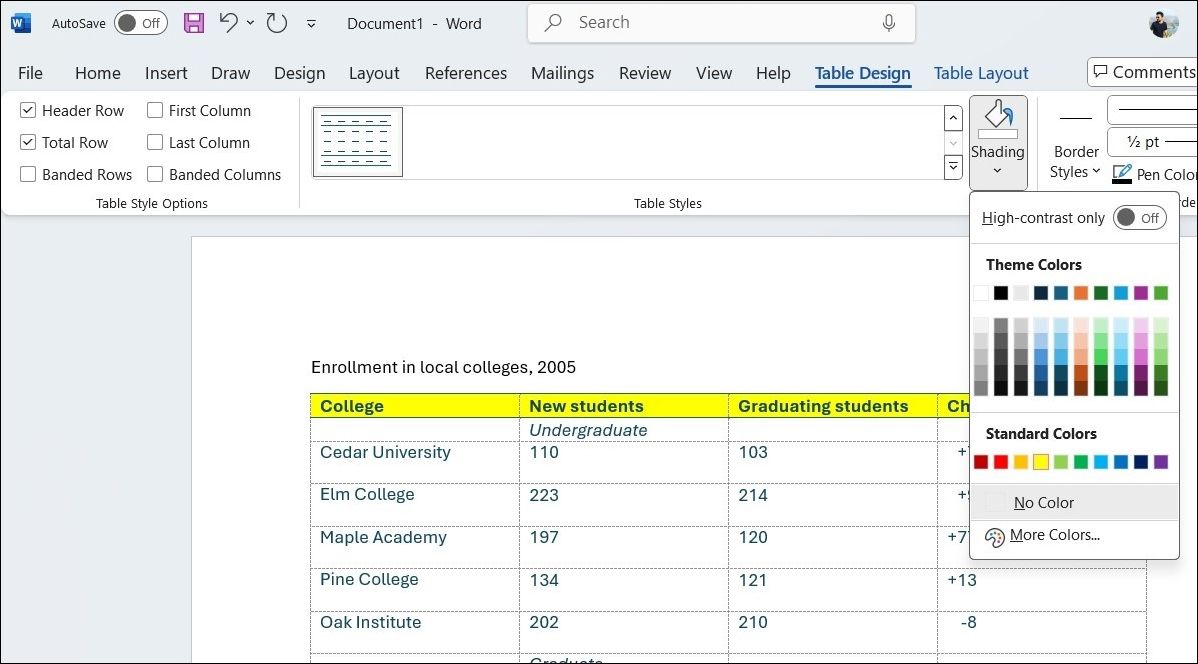
You can head to the Table Design tab and use the Shading tool to add background colors to individual cells, rows, or columns. In the same tab, the Table Styles menu offers a variety of pre-designed styles that instantly apply cohesive formatting to your entire table.
5
Convert Text to Table (and Vice Versa)
You don’t always have to create a table from scratch. Word allows you to quickly convert existing text into a table, saving you time and effort.
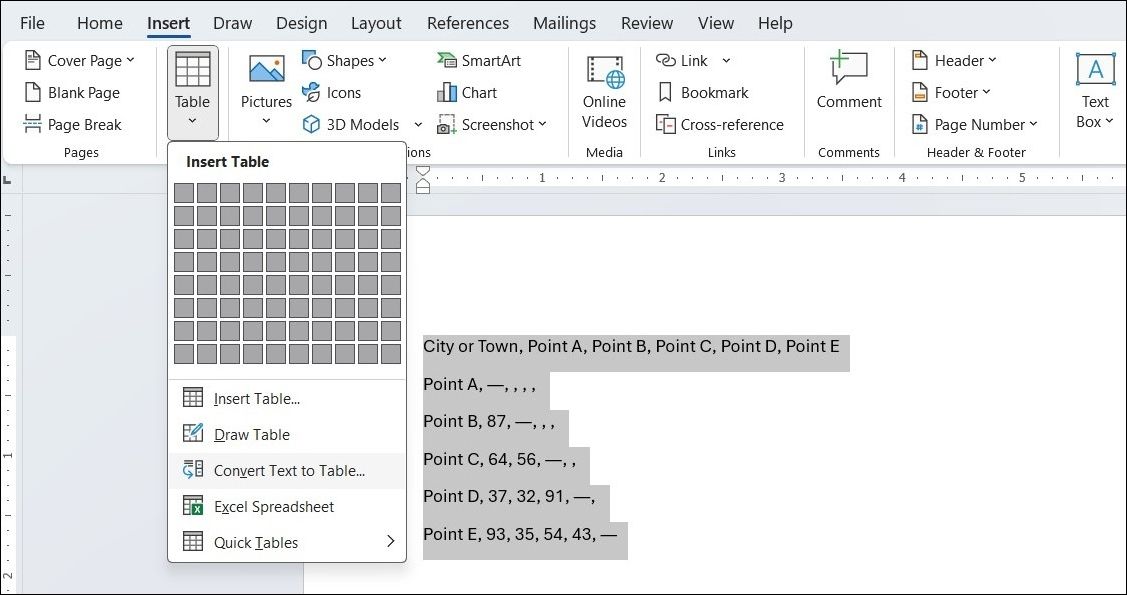
To do this, select the non-tabular data in your document and go to Insert > Table > Convert Text to Table. Word will automatically analyze the text separators to determine the number of rows and columns and then format the content into a table.
If the table doesn’t turn out as expected, you can use the Convert Text to Table dialog box to specify how Word should separate the data into rows and columns. This feature is particularly useful when importing non-tabular data from CSV or TXT files into a formatted table.
If someone requests the data in comma-separated values (CSV) or another delimited format, you can convert the table back into text. To do this, select the entire table by clicking the “move” handle above the table. Then, go to Table Tools > Layout and click the Convert to Text option in the Data group.
6
Auto-Fill Column Numbers
While Microsoft Excel makes auto-filling a sequence of numbers easy, Microsoft Word doesn’t have the same built-in feature for tables. However, if you want to quickly create a numbered column in your table, it’s easy to do so.
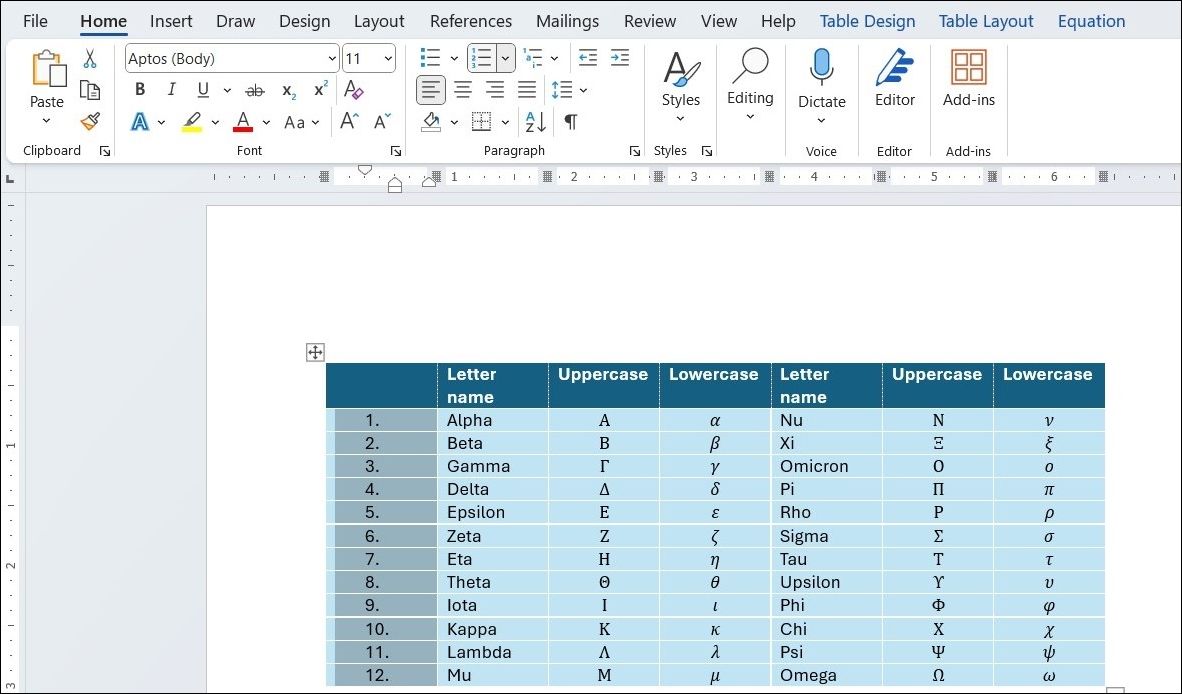
First, create a new column for the serial numbers if one doesn’t already exist. Select the column by positioning the mouse over the column header. Then, go to Home > Paragraph and click the Numbering button. Word will automatically generate a number sequence in the selected column.
7
Freeze Those Tables!
Tables in Microsoft Word automatically adjust their dimensions to accommodate new data. However, there can be instances when you don’t want the table to change size, even when new data is added. In such cases, you can “freeze” the size of the cells.
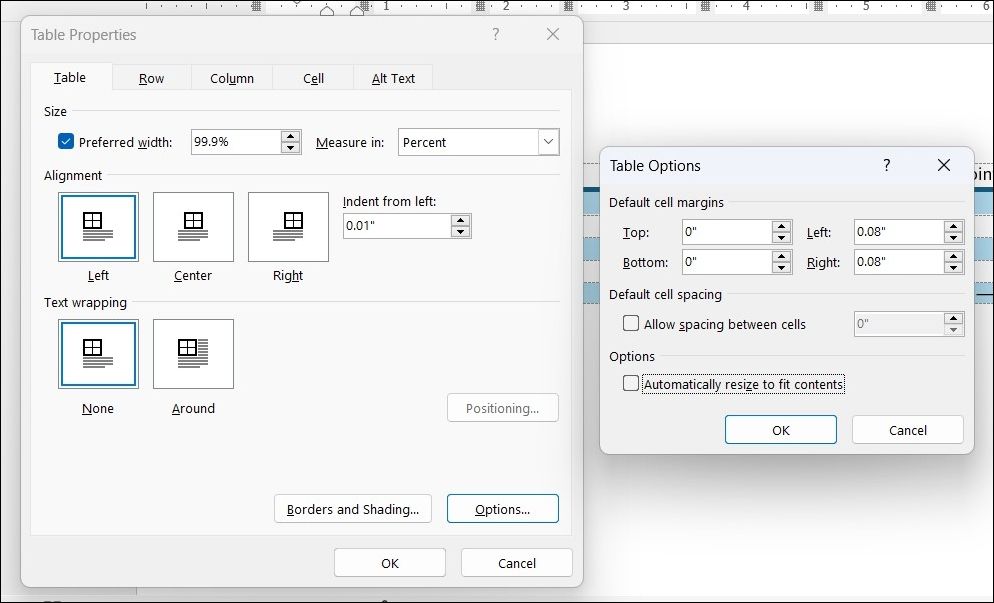
To do this, first specify a fixed size for the cells by navigating to Table Properties > Row. Then, enter a value in the Specify height box and select Exactly from the dropdown for the row height.
Next, go to the Table tab, click the Options button, and uncheck the Automatically Resize to Fit Contents checkbox. Click OK twice to exit the Table Properties dialog box.
This also resolves the issue of inserting an image into a cell, preventing the cell from expanding to accommodate the image. If the image is larger than the available space, it will be cropped to fit within the cell.
8
Change Rows Into Columns in a Table
There are times when you may need to change rows into columns and columns into rows. For instance, when the number of columns exceeds the page margin. This process is known as transposition.
Unfortunately, Word doesn’t have a built-in feature for transposing tables. To get around this, you can copy your table into Microsoft Excel, where you can switch rows into columns. Once done, you can copy and paste the table back into Microsoft Word.
9
Paste Perfect Excel Tables Into Gmail
By default, Gmail does not retain the spreadsheet formatting when you paste data from Microsoft Excel. To email tabular data without attaching it separately, you can use Microsoft Word as a bridge.
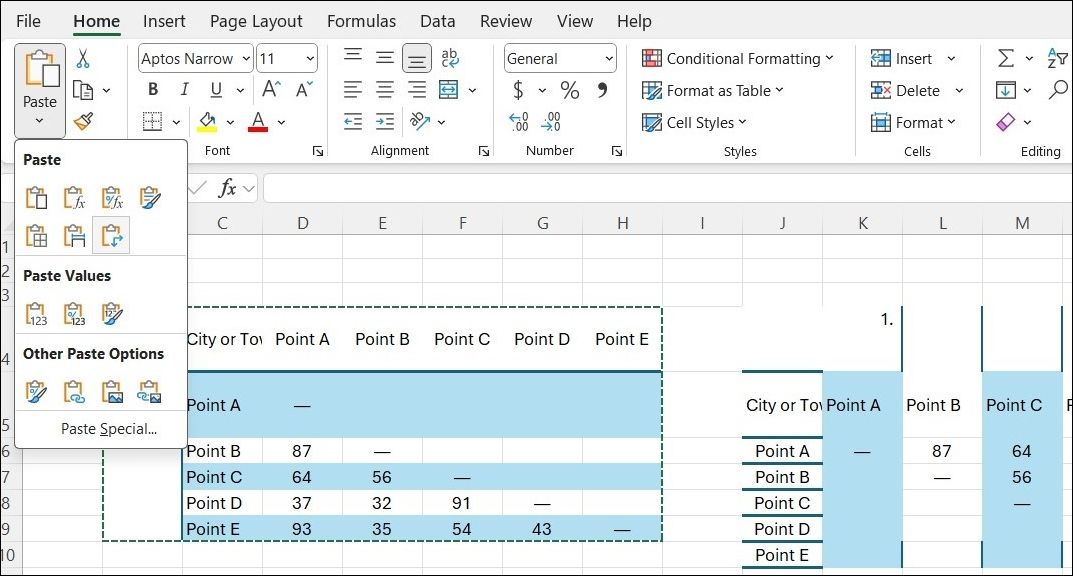
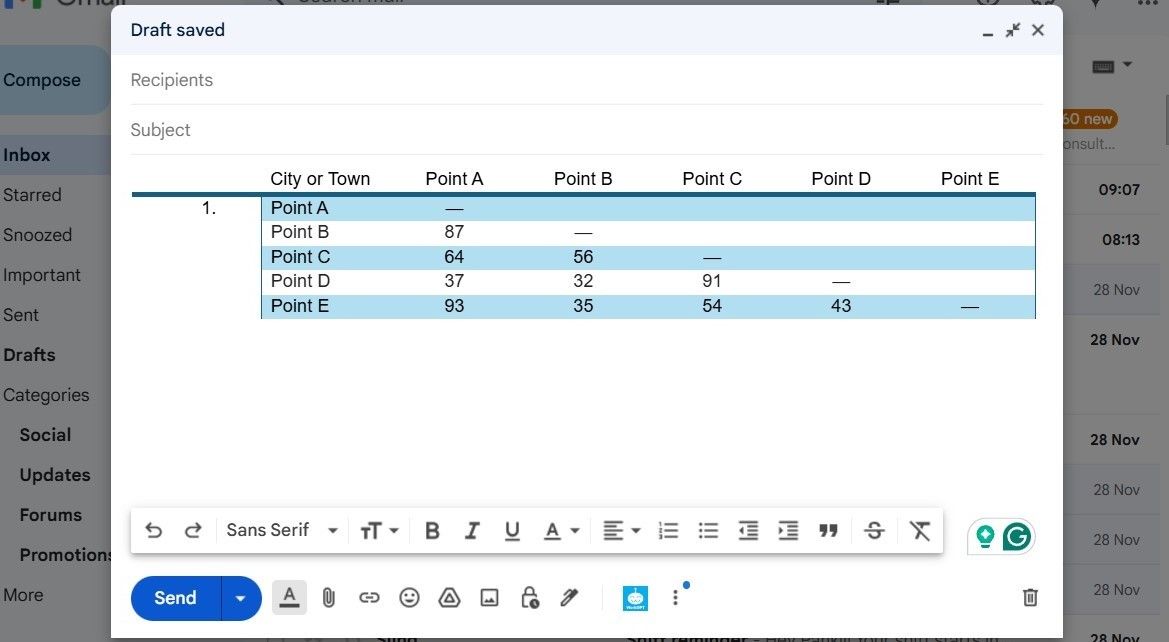
First, copy the Microsoft Excel table and paste it into a Microsoft Word document, ensuring that the source formatting is retained. Then, copy the table from Microsoft Word and paste it into your Gmail message.
This method ensures that your table retains its clean, organized appearance, making it easy for recipients to view the data directly within the email body—no attachments required.
10
Reuse Your Tables to Save Time
Formatting tables in Word can be a rewarding experience, but there’s no need to repeat the process every time. If you frequently use a specific table, Word allows you to save it for future use.
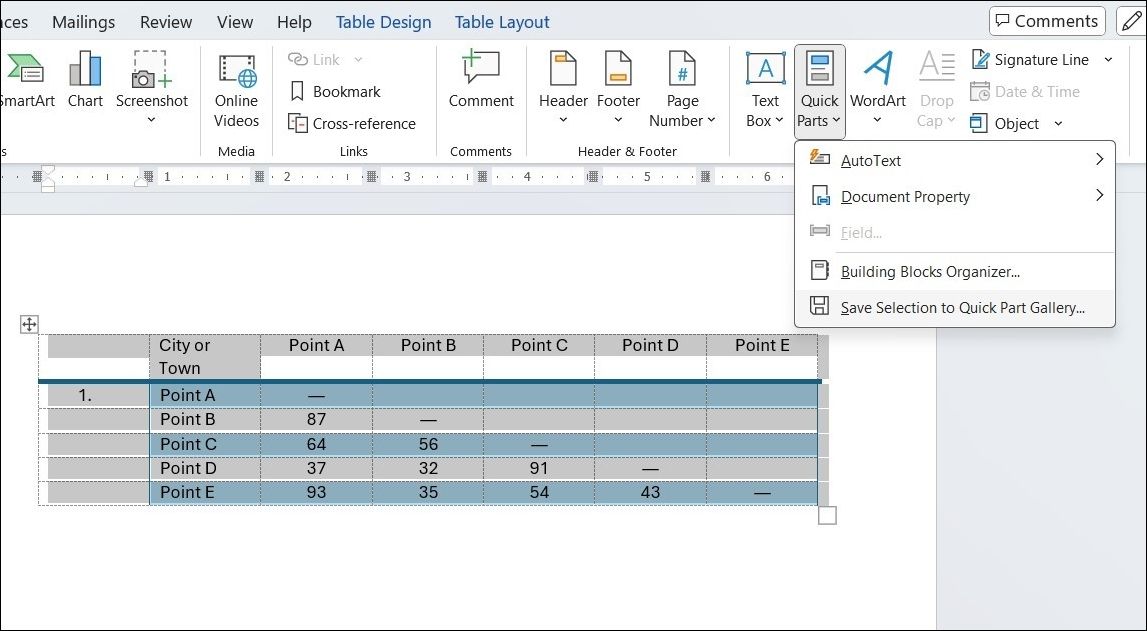
Once your table is ready, go to the Insert tab, then select Quick Parts > Save Selection to Quick Part Gallery from the Text group. After saving a table to the Quick Part Gallery, you can easily reuse it by clicking the Quick Parts option and selecting your saved table from the gallery.
The above-listed formatting tips are perfect for anyone who frequently uses tables to organize information in Microsoft Word. By applying these techniques, you can create tables that are not only functional but also visually appealing and easy to read. So, don’t hesitate to give them a try and elevate your Word tables to the next level!
